Free shipping on orders over $500

My Work

Philosophy

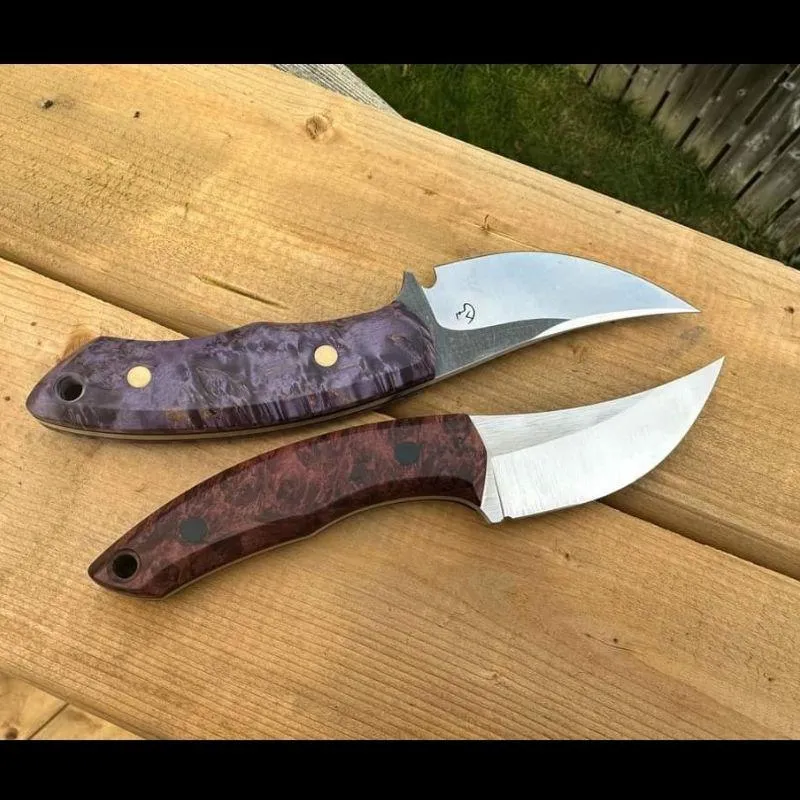
My philosophy towards my craftsmanship and products is to balance form and function. I am not interested in highly polished collector’s pieces, nor in trying to push the limits of performance in a single category of how a knife can function. I like to make knives that are beautiful to look at, comfortable to hold and use, made to stay sharp, and strong enough to be put to work.

Creating such a product requires knowledge of the materials used like the steel for the blade or the synthetic/natural materials used in the handle. It takes skill and experience to shape them appropriately and finish them accordingly to optimize their function and aesthetics.

On this page I’ve tried to give a general breakdown of my knifemaking process for those interested. It is not detailed instruction or a tutorial, but just something to give my customers an understanding of what they’re paying for and why it’s worth it!

Please keep in mind that I am not selling perfection. These are not products stamped out or CNC machined, they are made by hand and every single one I have ever made has “mistakes” to it. Having said that, most customers never notice them because they are usually minor aesthetic imperfections (I can be very picky!). Moreover, I would not send out a knife if it had a critical error. If one ever slips past my quality control, reach out to me and I’ll correct the mistake! I am always improving my craft and learning how to do things better. I am proud to say that even some of the first knives I ever made have become my customers favorites, even taking the #1 spot in collections worth thousands of dollars!

Knifemaking Process

Planning and Design

The first step in my process is to consider what function the knife will have. What is it used for and in what capacity? That will determine certain parameters for me to work within. Everyday carry (EDC) knives are usually kept small and not ground too thin (though sometimes I like to make em’ slicey) in order to be easy to carry on your person and functional in a variety of uses. Kitchen knives are ground very thin and should be made using a tough steel. Some blades are meant to be very cool and stylish, in those cases I opt for design elements that may not necessarily serve a purpose but make the knife stand out!

Choosing the steel is very important as well. I, like many makers, have decided to use AEB-L or Nitro-V as my main steel. Both are very tough and stainless steels while also holding a sharp edge very respectably. AEB-L is tougher and Nitro-V more stainless but both perform exceptionally well. With a great heat treatment and the geometry adjusted for the necessary task, there’s not much these steels can’t do!

Designing the knife is critical. The profile can say a lot about how a blade will function. The shape and ratios of the blade and handle will directly impact how easy the blade is to use. Choosing the right stock thickness for the steel and handle scales also heavily impacts the functionality of the knife. I have to make many decisions at this point and figure out exactly how the knife will be made from start to finish because many little choices can be made that don’t work together. This is probably the single most important step, also very time consuming, in knifemaking. Once I know what to do, the work can begin!

Prepping the Blank

I take my design and glue it onto a bar of steel the appropriate thickness. Firs, I cut out the rough shape, then I smooth out all the lines using my 2x72 belt grinder. Then I drill holes for the pins, lanyard hole, and weight reduction. Add some jimping to the spine. Maybe reduce the stock thickness if needed on my surface grinder attachment. And possibly do some pre-heat treat grinding.

Heat Treat

The heat treat is another critical step in the knifemaking process. The heat treatment is considered the “soul” of the knife. It’s a process you’ve most likely seen in the movies (probably done incorrectly on the big screen). The steel must be heated to its critical temperature, quenched, and then tempered.

This is the only step of the process that I outsource. While I could buy the necessary equipment and do it myself, I would still need to spend the time doing it and execute perfectly every time. Instead, I send my blanks to a local professional heat treatment facility. They have much better equipment, much more qualified people, and do an outstanding job. I’ve had excellent reviews on the heat treatment of my blades from customers and even a professional knife sharpener with a huge amount of experience sharpening all sorts of exotic steels with heat treatments that push the boundaries of what a steel can do.

Grinding Bevels

Once the blade is back from heat treat I grind in the bevels and do some surface finishing to the blade. Satin finishes, stonewashing, acid etching, rock texturing…. all that fun stuff is done now.

Handles

Next up is handles! I’ll select my material, cut it out with the appropriate tools, drill the holes for pins or screws, shape the front and sand it, then use good quality epoxy to “glue” the handle scales to the knife blank. I usually let the epoxy cure over night and then get to work grinding the shape of the handle however I like. I really like doing chamfers as they bring out the profile of my designs. While that takes more work and care than rounding contours, I think the results speak for themselves. Next up is hand sanding, I use sandpaper to put a nice finish on the knife handle and tang and take it up to whatever grit I think suits the handle best. Micarta I take up to 220 grit, very low but keeps the nice texture feel of the material. G10 to 400, leaves it feeling soft and smooth and nicely finished. Wood handles usually higher, anywhere from 600 to 2000 grit.

Kydex Sheath

I use Kydex to make sheaths for my knives. Kydex is a thermoforming plastic, when it gets hot it becomes very soft kind of like wet lasagna, and can be wrapped around the knife and clamped in a press. I clamp it tight and leave it till it has cooled and become hard again. Then I shape it and finish it to give a nice sheath that doesn’t need maintenance and keeps your knife locked in secure. I then attach either belt clips or straps to the sheath to make it easy for the customer to carry.

Marking- I etch my makers mark into the blade. I will most likely offer the option for additional custom etching in the future. For deeper laser engravings or more detailed engravings I can recommend other makers who offer the service.

Sharpening

Ultimately, people want a knife to cut things. And a sharp edge is what it’s all about. Running the edge on a belt sander can quickly mess with the heat treatment of the knife at the very edge, possibly reducing the edge retention by 30% or more. That’s why I do my sharpening by hand on waterstones. I might start the edge on the belt sander but all the finishing is done manually. This is more time consuming and requires a lot of skill, but in my opinion the results are worth it. I can decide what angle the edge bevels should be and what grit to finish at while deburring without buffing the edge and leaving it slick with little bite. It’s an excellent skill that I advise anyone who is a knife enthusiast or works with their hands to learn. Once you cut with a sharp knife it’s hard to even hold a dull one!

Finishing

Finally the knife is almost done. At this point I will usually put a touch of oil on the blade and on the handle or if I’m using wood then I will usually finish it with a hardening wax. This brings out the color of the handle and darkens acid etches on the blade. The wax finishes can also offer a good deal of water protection to wood handles while keeping them look pretty for a long time.

Connect On Social

Shah Bladeworks

2024 - All Rights Reserved.

Privacy Policy

Powered By Zaka Digital